Tuesday, December 28, 2010

Sneak in a little nutrition

I know, it's 12:34 a.m and I'm still awake. And I don't even have the excuse of my kids still being awake or anything like that. I'm just here, by myself, thinking about life. Don't get me wrong, I am tired, but there's just too much going on in my mind right now. So since it will probably be a waste of time to even try to go to bed at this moment, I decided to share a little something on here.

Today I was thinking about my kids' nutrition, it's funny how they go through fases. My oldest daughter used to be a really good eater and my youngest a very, very picky eater. Well, that hasn't changed much but my youngest IS eating a lot more. He used to eat very little, if any food at all. I nursed him until he was a year old, and that's pretty much all the nutrition he got up until that point. He never liked any baby food, except for some occasional pureed fruit. He wasn't just picky, he was, and still is, a very MESSY eater. It's funny how I still get fooled thinking he has eaten pretty much all of his food only to find most of it on the floor. And that happens pretty often. I should've learned not to get my hopes up before looking down by now. But I guess us mothers never lose hope when it comes to our children. WOW. How deep. Okay, nutrition! Geez. It's late!

Well, the other day I was at Anna's house and we were talking about our picky eaters and she mentioned how her son absolutely LOVES pizza. And since he's a very picky eater, she decided to make a pizza but throw all kinds of veggies on top. Pretty smart, eh? And since it was a pizza, he ate it! I haven't tried this yet but I'm pretty (almost) sure my son wouldn't eat it. He's THAT picky. He would just look at it and make a grossed out face or if he dared to try it he would probably spit it all out (and maybe even gag a little). But I will try making this and will tell you all if I was right or if I was right. Okay?

After that day, I started thinking about other ways I can make healthier foods that my children (or more specifically my son) WILL eat. There is one book called Deceptively Delicious  which I really want to get. A friend of mine suggested it. Have any of you read it?

  Also, I found a couple ideas on the What to Expect website. I've probably mentioned this website on here many times before but it's got some great information. For the entire article, click here.

If you just want to stay on this page and keep reading, here are the tips they give you:
  • Slip in some veggies. Add finely grated vegetables (carrots, beets, zucchini work well) to rice, cottage cheese, or even macaroni and cheese; they add a little color and a lot of nutrition.
  • Say cheese. Boost the calcium quotient by grating mild cheeses such as cheddar, Colby, or Monterey Jack over veggies, or mixing cottage cheese into pasta.
  • Redo the recipe. You can hide almost any veggie inside a meatball. Whenever you cook chopped meat, toss in some grated vegetables (again, carrots, beets, zucchini). They add a mild flavor, lighten the texture, and up the nutritional ante. Serving tomato sauce? Whether it's homemade or from a jar add in some finely chopped peppers, carrots, parsley, or beans, and cook till the veggies soften. If you like, run the sauce through the blender or food processor to totally hide the additions.
  • Get fruity. Mash super-nutritious blueberries into pancakes to make "bluecakes"; make whole-grain raisin muffin-cakes with cream cheese "frosting" — this muffin trick works just as well with carrots, pumpkin, and zucchini.
  • Sundae best. Layer pureed (or finely chopped) fruit with yogurt or cereal in a tall parfait glass. Or make a banana split for breakfast with a quarter of a banana, a dollop of yogurt, and a sprinkling of cold cereal.
  • Pizza time.  Sprinkle small pieces of soft-cooked (or roasted) veggies on top of homemade or store-bought pizza.
  • Bake it in. For a real treat, make (good-for-you) cookies together. Look for healthier recipes such as oatmeal raisin or ginger snaps made with whole grains. Or grate zucchini or carrots into the batter of plain cookies or muffins to boost the fiber and vitamins.

Now you probably already know many of these. But I want to know more! Even MORE sneaky! So tell me what is YOUR secret to making your picky eaters eat healthy? Please share! =)

I think I can sleep now. Sweet dreams!

Friday, December 24, 2010

12 Days of Christmas - The Final Day!

Do I even have to tell you what we're doing and what you should be doing today?!

Well, just in case:

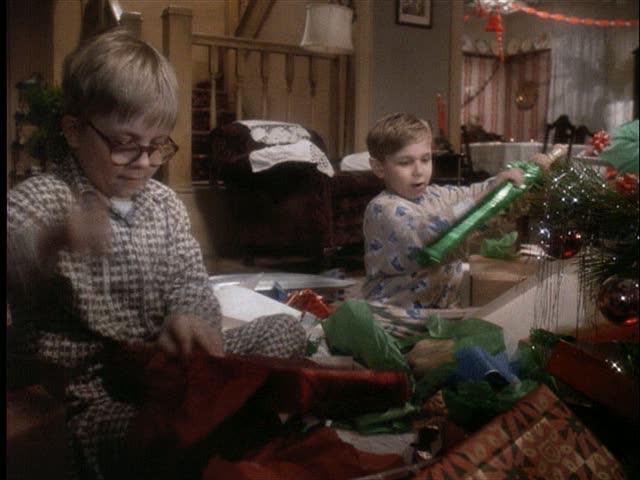
We'll be opening presents, enjoying a wonderfully delicious breakfast, watching A Christmas Story and probable some other Christmas movie, we'll be enjoying family and friends, laughing, and most importantly remembering Christ's Birth. :o)

Merry Christmas Everyone! I hope you all have a wonderful day.

12 Days of Christmas - Cookies for Santa

For me, this is one of the cutest Christmas traditions - and yummiest too of course!
Since my kiddos are still way too young to actually understand what's going on, we're not actually leaving cookies for Santa, but we are making cookies and eating it all up while listening to some wonderful Christmas music.

Here are some really yummy recipes:

Nestle Toll House Chocolate Chip Cookies (my personal fav by far)
Gingerbread People
Lemon Pistachio Wreaths
Thumbprints (this one I want to try out with guava jelly instead, like the casadinhos in Brazil)
Cut out Butter cookies 
Chocolate Pretzels

After all... I'm sure Santa would appreciate some variety right?!

(oh and we're reading The Night Before Christmas... not that we haven't read that book a million times already, but I just love it, and there is nothing like reading it THE night before Christmas.)

Tuesday, December 21, 2010

Naitivity


My Nativity Sets are really special to me, plus they are fragile, so I decided to not put them out this year.
After a few days I started really missing them. So we made this: Our own little kid-friendly-non-breakable-recycled-nativity set!


I used a basket we had laying around, some toilet paper roll, tissue paper and construction paper, and a glue stick and marker. Just glue it up and place it how you wanted. I had plans to also make a sheep and a cow a shepard and the wise man, but we ended up just doing the "main characters". But it was fun and super easy. My two year old loves playing with them, moving them around and I love that I can let him!

Sunday, December 19, 2010

Christmas Lights


Less than a week!

Bundle up and go see some Christmas lights! And watch these videos of musical christmas lights - they are so cool!


Saturday, December 18, 2010

Hot Chocolate and Christmas Movies

 There are SO many Christmas Movies out there, that it's hard to pick a favorite. Here is a list of a few that are worth checking out this Christmas.


And then... why not pair it all with some delicious hot chocolate?! Check out Our Best Bites and their gourmet hot chocolate recipes, and be sure to check their smores hot chocolate!

Friday, December 17, 2010

Satined Glass Cookies - Snow Globe


Have you seen these around blogosphere?! I think they are just daring!!!

Great for eating, but I also saw this great idea - stained glass cookie snow globe. It's genius!

Damaris at Kitchen Corners give a great little how on it. Go check it out... it's actually quite easy!

Thursday, December 16, 2010

CHRISTmas Ornaments

We're up to the 9th day! Can you believe it?! Christmas is just around the corner and with that, the end of the year...

So I wanted to also bring a little more CHRIST into our Christmas, and really try to teach my two year something about the true meaning of Christmas. So we made some CHRISTmas Ornaments for our tree.


 Again, this can be as involved or as simple as you'd like it to be. I just cut out some pictures of Christ from the Liahona, and together we glued it to some construction paper, then I taped some ribbon to the back and that was that!
 I let him color the "frames" and then put glue the pictures on them. As we were making the ornaments I started telling him that Christmas is Jesus "happy birthday". I think he at least understood that Christmas and Jesus go together, and that it's special (he knows birthdays are special).

 So then, we even had a second activity which as totally his idea - he decided to make a card for Jesus. You see, for my husbands' birthday we made cards and porters and put them all over the house - and that's what he wanted to do! So we did it -I thought it was so cute of him, and that it really was a great idea... after all - it really is Jesus birthday!


Cheri at I Am Momma - Hear Me Roar also has a great idea on how to make these a little nicer/classier/long lasting.

Wednesday, December 15, 2010

Ginger Bread House

I actually opted for a faux-ginger bread house this year (aka foam house). I just figured it was WAY too much candy for a two year old to be dealing with, because, I am pretty sure he (and I) would just eat all the candy, and the house would be left bare... 


You can either get your own foam sheets and make this yourself, or buy a kit like this one where everything is ready to assemble - just peal and stick. I know, not half as fun as a real ginger bread house - but it will yield lots of fun for your kids just the fun! I know we had lots of fun. 

Another thing you do, is do something like the paper stocking on the previous post... cute out a house and have your kids decorate it with whatever you have at home.

Or... you can go for the real deal.


What you'll need:
  • 7 graham crackers
  • Frosting for glue (recipe below)
  • Assorted small candies for decorating
  • Ribbon
  • Pastry bag and tip or Ziploc bag and scissors


Frosting
  • 1/2 pound confectioner's sugar
  • 3 tbs. butter/margarine
  • 1/2 tsp. Vanilla
  • 1 1/2 - 2 tbs. Milk


How to make it:

  1. Mix all the ingredients together until smooth and easy to spread, but not runny. Add more sugar if too runny.
  2. If you have a pastry bag, place frosting in bag and use a small tip. You can use a Ziploc bag cutting a small hole in the corner.
  3. Place one graham cracker flat on the table, squeeze a little frosting around all edges. You may need an extra pair of hands.
  4. Place one cracker on each side standing up. It now looks like a box without a top.
  5. Carefully squeeze more frosting on all outside corners from top to bottom and around the bottom of the box.
  6. Let stand for a short while to let frosting harden a little. This will make working with the roof a little easier. (a tip when doing this with kids is to make the house ahead of time!)
  7. Now squeeze frosting on two of the top edges of the box and place the last two graham crackers in a V shape on as the roof. Looks like a triangle on a box now from the side. It may overhang if you can get the frosting to hold for you.
  8. Squeeze frosting along the top of the roof where crackers join. Let stand again until frosting hardens a little.  (a tip when doing this with kids is to make the house ahead of time!)
  9. Now comes the fun part - with leftover frosting, cover the roof to look like snow. (two sides are left open) Then squeezing small amounts on candy, place candy on the house to decorate. You can use the frosting to add things like doors and windows. Just use your imagination.
So, don't be lame like me, make real gingebread houses! 


Tuesday, December 14, 2010

Paper Stockings


This activity hardly needs a how-to, and it's so simple and so fun and to make it even better - the possibilities are endless!!!

I simply cut out the shape of a big fat stocking on a piece of construction paper, got out some glitter glue (because, believe it or not, that's the only kind of glue I had) squirted all over the place and let my 2 yr old go wild with scraps of xmas fabric.


He had a blast, and I had a blast helping him while I made some real stockings for our family - aren't they cute?!

So like I said, possibilities = endless! You can just let them color, or finger paint. Or you could use magazine cut outs, or junk mail cut out, or just other colors of construction paper. You could do this in felt. You could add other things to the party life buttons, pompoms, glitter (if nor not using glitter glue, or if you just want MORE glitter), stickers.

You could plaster the stocking with glue and then let the kids make scrunched up balls of paper or tissue paper and let them place it wherever.

You could use popcorn! Or macaroni! Or cereal!

See... endless possibilities!

Monday, December 13, 2010

12 Days of Christmas

Tomorrow starts the musical countdown to Christmas! And to celebrate I'll be sharing with you, one or more things everyday to make these days extra especial. We'll be doing everything from gingerbread houses, to homemade ornaments to cookies for Santa, everything so we can enjoys as much as we can this 'most wonderful time of the year'!

These are all simple ideas, made with things that you will probably have around the house!
So join in the fun!

Saturday, December 4, 2010

Accidents in the kitchen

The other day as my husband was cooking dinner, my two-year-old son (who can't stay away from his daddy) held on to the over door handle and went for one of the front burners that were on with boiling water. We have a gas stove and that is even more dangerous. My mom and I quickly grabbed him, but I'm sure my husband thought we were over reacting. He probably also thought he had total control of the situation and that he wouldn't let anything bad happen.


We can never be too careful when it comes to kids in the kitchen. It is definitely the place where children get hurt more often in a house. My mom got her whole arm burnt when she was only one year old. They were getting ready for a Christmas dinner and her mother was frying an egg before the dinner because her dad wasn't home yet and she was getting hungry. All my mom did was hit both hands on the oven door and since I guess the pan was a little wabbly the hot oil spilled all over her arm, ear, foot and stomach. Her left arm is still covered in scars. My grandmother put her arm immediately under running water and the doctor said that saved my mother's life.


I know of a little boy who picked up a bottle of olive oil and after it shattered  on the ground he slipped and fell and got serious cuts all over his body.

Just the other day my two-year-old nephew was here playing with my son and we come downstairs to find out they had opened the dishwasher and had scissors and steak knives in their hands.

I'm pretty sure you've all had experiences like these or know people who have. We can never be too careful when it comes to little kids in the kitchen. The other day my son wanted to get his Buzz Lightyear from the kitchen counter so he went and grabbed his tiny little stool to climb on. He had never done that before or even thought of it, but since it was a toy that he really wanted he thought and acted fast.

Please keep all the knives up where they can't reach. Before you know it, they'll be tall enough to reach the places where we thought they couldn't reach before.

Whenever you're cooking, make sure they are away from the oven, and if cooking on the stove top do not use the front burners unless you really need to. And if so keep the pan handles to the back of the stove, never where the kids can reach and pull it down.

Always make sure you have the appropriate child locks for cabinets and drawers if you need them (we don't have any because we usually keep the dangerous stuff up where they can't reach).

If an accident does happen though, we have to be able to act fast. Here are some helpful tips of how to treat burns in children:


Burns in children vary in their severity — and are classified by degrees:
  • First-degree burns affect just the outer layer of skin. Your little one’s skin will be red and swollen skin and she’ll be in some pain.
  • Second-degree burns involve the first and second layers of skin. Your child’s skin will be bright-red, swollen, and blistery, and she’ll be in severe pain.
  • Third-degree burns involve all layers of the skin and underlying tissue. Your child would have a wound that looks charred, black, white, leathery, or waxy. She may not be any pain because the nerves on the skin are damaged.

How to treat burns in children

First separate your child from the source of heat as fast as possible.
  • If any part of a child is on fire, wrap her in a blanket, coat, bedspread, or even your own body, and (if you can) roll her on the ground to extinguish the flames.
  • If a chemical substance has burned your child’s skin, flush the area with cool water for at least five minutes before removing any clothes — this will prevent you from exposing any other parts of your child’s body to chemicals. Then continue flushing the area with water for up to 20 minutes. If the chemical is a powder, brush it off the skin before flushing the area with water.
  • If your child has experienced an electrical burn, disconnect the power source. If you can’t do that, separate your child from the power source by using a nonmetallic object (such as a wooden spoon, a rope, or a large book). Never use your bare hands (you risk getting a shock, too).
Next, treat the injury — though treating a burn depends on how severe it is:

To treat minor (first-degree and small second-degree) burns in children

  • Remove any clothes from the injured area. Remember that in the case of a chemical burn, you’ll want to flush the area with water for several minutes before removing any clothes.
  • Run cool water over the wound for at least five minutes or until your tot seems to be in less pain. Or put a clean, cool wet cloth (or washcloth) on the burn for several minutes or until her pain subsides — you’ll probably need to continue re-wetting the cloth to keep it cool. Do NOT apply ice, butter, or powder to the injury since this could aggravate it. And do NOT break any blisters since this makes the wound more vulnerable to infection.
  • Gently pat the skin dry and cover it loosely with a nonstick sterile bandage or gauze to protect the skin.
  • Give your little one a pain reliever such as acetaminophen or ibuprofen (but don’t give ibuprofen to babies under six months).
  • Call the doctor. Your pediatrician may recommend applying aloe or another topical ointment like Silvadene (for which you’ll need a prescription ) for treating a burn, but minor burns usually heal without much more treatment. Just watch for signs of infection — redness, fever, swelling, or oozing. Depending on the burn, the doctor may advise you to avoid exposing the area to sunlight for several months to prevent your child’s skin from becoming discolored.

To treat large second-degree and any size third-degree burns in children

  • Remove hot or smoldering clothing only if the clothes don’t stick to the wound. Remember that in the case of a chemical burn, you’ll want to flush the injured area with water for several minutes before removing any of your child’s clothes.)
  • Lay your little one flat, and, if possible, raise burned body parts above her chest level. Apply a cool washcloth (or any clean, lint-free cloth) for ten to 20 minutes. Note that you may need to re-wet the washcloth periodically to keep it cool. Don’t immerse large areas of her body in cold water since this could cause shock.
  • Do NOT apply ice, butter, or powder to the area since this could aggravate the wound. And do NOT break any blisters since this makes the wound more vulnerable to infection.
  • Gently pat the injured area dry and cover the burn with a sterile cloth or bandage (or a cool, lint-free sheet). Keep your child as warm and comfortable as possible to prevent shock.
  • Call a doctor as soon as possible (for a severe burn, call 911).

When to call the doctor

When treating a burn, it’s important to call the doctor as soon as you’ve dealt with the injury. Call 911 as soon as possible if the following conditions apply:
  • You think your child has a serious or large second- or third-degree burn.
  • The burn comes from a fire or is an electrical or chemical burn. (In the case of an internal chemical burn — your child has swallowed drain cleaner, for example — call Poison Control instead at 800-222-1222.)
  • Your child is having trouble breathing or isn’t responding.
I hope these tips were helpful. I got them from THIS website if you are interested in reading more about this subject.

Do any of you have any other helpful tips when it comes to child safety? It doesn't necessarily need to be in the kitchen. Please share!